Prebrskal sem celoten elektro forum (pač sem se šele sedaj pridružil in sem še precej zelen), kjer po večini pišete, da je za letenje potrebna vaja, vaja in še enkrat vaja. Že res, da je letenje neizmeren užitek, vendar pa mi moj vsakdan ne omogoča pogoste vadbe letenja. Tako bi pač rad čimveč izvedel o letenju v teoriji zato, da bi tisto malo časa, ki ga imam na voljo lahko izkoristil za iskanje in urnjenje točno določenih tehnik itd.
Saj vem, da se ne da vse v teoriji izvesti, vendar sem že dostikrat opazil, da takrat, ko vem da je ogromno tremike z modelom le "vozim" sem in tja po zraku ter takorekoč "slučajno" naletim na termični balon, ki pa ga po parih metrih seveda preletim (saj ga ne opazim- zaznam /za kar predvidevam, da je potrebno nekaj izkušenj/).
Torej problem je nasleden: Kdaj zaviti z jadralcem v termični balon (kako bom vedel, da je okoli modela termični balon), na katero stran zaviti, ali dodam višino ali ne, kje ponavadi nastajajo te termični baloni (nad travniki, njivami, na kakšnih pobočjih itd.), kako se leti v termičnem balonu (kroženje, ostri zavoji z dodajanjem višine, uporaba zračne zavore, itd.) ter kako čimbolje izkoristiti termični balon (nekje ga pač zapustimo in poiščemo drugega).
lp
Crt
PS: sam sem letel z modeli Telstar (obema modelom je plosknilo krilo pri izvajanju akrobacij /beri kovitov in podobnih/ s prižganim motorjem), sedaj pa gradim Telstar Race s katerim pa se mislim kar najbolj posvetiti letenju v termiki.
Jadranje v termiki
Moderator: blisk
25 prispevkov
• Stran 1 od 2 • 1, 2
![]() Napisal/-a MC GAYVER » 27.10.2004, 11:52
Napisal/-a MC GAYVER » 27.10.2004, 11:52
dobre nasvete dobiš nahttp://mdm.zrcalo.si/forum/viewtopic.php?p=19755#19755
-

MC GAYVER - Stara sablja
- Prispevkov: 1522
- Pridružen: 06.03.2003, 18:18
- Kraj: Ljubljana
Re: Jadranje v termiki
![]() Napisal/-a overlord_tm » 28.10.2004, 18:25
Napisal/-a overlord_tm » 28.10.2004, 18:25
Letme napisal/-a:PS: sam sem letel z modeli Telstar (obema modelom je plosknilo krilo pri izvajanju akrobacij /beri kovitov in podobnih/ s prižganim motorjem), sedaj pa gradim Telstar Race s katerim pa se mislim kar najbolj posvetiti letenju v termiki.
V Telstare bi moral dati karbonse palčke
Termika pa povsod tam kjer se topel zrak dviga. Tud nad avtomobili
-
overlord_tm - Naš človek :)
- Prispevkov: 132
- Pridružen: 06.05.2004, 14:28
- Kraj: Domžale - Vir
![]() Napisal/-a mihah » 28.10.2004, 19:12
Napisal/-a mihah » 28.10.2004, 19:12
Na temo termičnega letenja sta dva DVDja, od radiocarbon art in nemškega airmix. Poučno gradivo  Potem pa koj na teren sprobat teorijo in dobivat praktične občutke
Sakura Racing XI Sport Master (Endurance, stock, mild modified, modified), Hyper GTB E, Tekno EB48, itd...
-

mihah - Forumski odvisnež
- Prispevkov: 2683
- Pridružen: 22.11.2002, 17:04
- Kraj: Mengeš
![]() Napisal/-a MC GAYVER » 29.10.2004, 12:03
Napisal/-a MC GAYVER » 29.10.2004, 12:03
še malo
By George Gassaway and Ken Mizoi
Usually in competition we look for anything that can help keep our models in the air for a longer time than they would get by themselves. It doesn't really matter what it is that helps, whether it is a thermal, wave lift, slope soaring, whatever. For purposes of our discussion, the types of lift discussed will be mostly of the thermal type. That in itself is hard enough to describe adequately.
This is also meant as a supplement to other articles about thermals. There is not much need to restate all that is described just as well in other sources. One great resource is an article written by Bill Forrey {see references}.
One of the big problems about discussing thermals is that there are several kinds of thermals, of varying strengths, and numerous theories and tips from other experts which do not necessarily agree. There are so many that to try to remember and analyze it all is just about impossible, it is hard to ever even know what KIND of thermal your model caught (or missed, as the case may be). It is also very difficult for someone to try to describe what they tend to look for, as it is often a combination of factors at a given moment, some of which may be subconscious concepts. Thermals are very hard to quantify, which is notable by how no two thermal articles seem to be alike. Every person has their own concept of thermal types and how to use them.
Or as some people have described it, it is a "Black Art". The only real way to learn is to read all you can, pick up what you seem to be able to keep track of for learning, get your own detection gear such as a thermal pole to learn with locally, start paying lots of attention to what the air is doing on the field, and note what theories and techniques work well enough for you to become somewhat consistent spotting thermals.
Thermal Heating
Thermals are formed by a difference in temperature of the air, and as we all know, hot air rises. It does not have to be "hot" or even warm though, thermals can form in winter if there is sufficient means for some cold air to become less cold than the surrounding air. Air does not retain or absorb heat well, it has to be heated by some means - generally by the ground. In most cases, the ground is heated by the sun, then the air at ground level is itself heated by contact with the ground.
The sun is usually the key to thermals. Ideal sun conditions are clear blue sky with the sun high in elevation, such as near noon. Highest maximum elevation occurs in late June, thermals do tend to be stronger in late spring and early summer than at other times of year. Thermal activity usually starts up around 9-10 AM and dies off by 4-5 PM. Contests are usually flown during that time frame anyway. The "prime time" hours are often between 11 and 3 PM, when the strongest thermals of the day usually occur. During NAR contests this can be exploited, during FAI contests it is harder to make use of since the rounds determine when you fly. Even if a day starts off nice and clear, it may very likely become partly cloudy later on as some of the larger thermals form cumulus clouds. They may even form into late afternoon showers or thundershowers. As such, it may be risky to wait too long in the day to fly some events at NAR meets.
On partly cloudy days there will be less sunlight delivered, and generally weaker thermals. Sometimes fliers wait for a cloud to pass by to reheat the ground and help form a new thermal. However, such a cycle can take a long time, at a NARAM you can literally have all day to wait for that if you want to, but under rigid round flying there probably will not be time. How long it takes the ground to reheat and form a thermal can range from several minutes to never, though if you plan to wait it out it will probably be at least 5-10 minutes after the sun reappears. Under most FAI round time frames, there may not be time to wait it out though.
Topography makes a major difference in how much and to what strength thermals can be formed. The best sites are those which absorb heat well, such as a plowed field or area with a lot of paved surface, surrounded by areas which do not absorb heat well, such as forests and areas with a lot of plant life. A farmer's field is great if it's been plowed under, the rough ground even presents more surface area to absorb heat from sunlight. But that same farmer's field could also be a "black hole" if it's planted with crops. Humidity also plays a role, the more humidity the less activity there is and the cooler some sites may tend to be. This is why some of those "Texas-sized" thermals get to be so strong, not just the capability of a lot of hot spots. Some of you may have noted it was less humid in Dallas than at NARAMs flown in Houston, Orlando, or Manassas. Similarly, flying over a pond or lake would not be a good idea in general through the day, although in late afternoon it might generate some lift as the ground cools but the water retains heat longer. A similar "heat sink" effect can occur from paved areas retaining heat late in the day or after the sun has been replaced by a buildup of cloud overcast.
Back to sites, what we often fly from tend to help generate thermals, or add to ones that have drifted from elsewhere "upwind". Rocket sites usually have short grass, tall weeds, dirt, pavement, or a mix of several of these (the tall weeds and grass is not so ideal, but often better than surrounding areas). Sites with a significant amount of paved areas tend to help generate good thermal activity, as the pavement absorbs heat from the sunlight better than other surfaces.
All of this helps to form a heated mass of air, laying underneath cooler air. Eventually something will trigger the warm air layer to rise upward.
Thermal Formation
When the air is heated enough, or the amount of warmer air is large enough, it will tend to bulge upward. As it does, it will displace some of the cooler air. This bulge will become larger, into a bubble which bursts through the cooler air. This rising bubble is a thermal, though in an early form. This bubble usually tends to form into a vortex ring, like a "smoke ring" . If the bubble or ring loses all contact with the ground, it will truly rise like a bubble, and be virtually impossible to detect from the ground. The only way of detecting that would be to happen to fly a model into one, unless the thermal happened to be detected as it was forming or breaking away from the ground.
Stronger thermals usually do keep contact with the ground, via a rotating column which helps to feed the thermal. This column is sometimes visible by the dust kicked up by it.. If the warm or "hot" spot that formed the thermal warms up additional air quickly enough, and/or if the wind is not too strong or turbulent, the column may stay connected to the source and create a virtually stationary thermal. Unfortunately this is rare. More often, the thermal drifts downwind on its own, picking up more warm air as it goes. It may help to create warm air by its own influence of calming the wind in the direction it is drifting towards, allowing the air in front of it to become more heated, or it may simply "harvest" other warm spot areas which have not yet burst through but are warm enough to feed the thermal as it goes by.
The kinds of thermals we often seem to pick are ones that are of the forming bubble or the developed column variety. Both give off clues of warmer air, shifts in wind, and of course, rising air.
As the bubbles, or the columns, pull in air from ground level, there is a tendency for the air at ground level to move towards the bubble center or thermal column core. After all, if there is warm air rising, air must come in to replace it. Also remember that where there is air rising, there is also air falling, at the outer fringes of rising air there is falling air or "sink". Notice the top view in figure 4 how much air is affected around the core It can be deadly to get caught in sink if you miss the thermal. That's what makes this such a risky venture.
As air is pulled in from the sides at ground level, it often rotates. A just forming bubble may not show such a clue, but a thermal column cannot exist without it. The rotation is usually, though not always, counter-clockwise. The size of the column core varies greatly, sometimes just 1-2 feet in diameter of a weak thermal, sometimes a hundred feet more more at ground level (the area of rising air is much wider than the column, especially at higher altitudes, though just how wide cannot be said) . Beyond that rotating column "wall" though, there usually does not seem to be much notable rotation.
Wind
It is important to become attuned to the behavior of the wind, as that is one of the most useful clues in trying to locate a thermal. It is important to note direction, velocity, smoothness or turbulence, and most importantly, when and why it changes direction and/or velocity. And never think that the wind is "blowing down the field"; the chances of the wind blowing in a particular direction are one in 360, as in 360 degrees. The wind is going to blow whatever direction it wants to, regardless of what the shape of the flying field is like or your concepts of where it "ought" to go.
One of the first things to make note of on the field is the wind direction and velocity. Keep a mental note of the direction and velocity, to develop a feel for what is the general wind direction and intensity. Throughout the day the wind will usually become stronger (until later afternoon when thermal activity also dies down), and the direction may permanently shift, so that you'll need to update your impression of the general wind, its general behavior in the previous hour (or even half hour) is of more value than what it was like 3-4 hours before. The reason the general wind direction changes significantly through the day can be due to several factors, such as approaching pressure and weather fronts. In lighter wind conditions, the wind can shift due to interaction of the region's topography and weather. It helps to check the weather forecasts for what the expected weather for the day is supposed to be, including wind direction and strength. If the wind direction is significantly different from what it is supposed to be, you'll know to be aware of a likely permanent shift later in the day.
The reason for getting a feel for the general wind is that thermals cause localized changes in the wind. The thermals are pushed along by the general wind, but do create their own apparent shifts in wind. Those shifts in wind can be used to help in locating a thermal. However the shifts can tell you very little, and could be misleading, if you do not have a good feel for the general wind to compare it to. Otherwise you won't know how or why it's different.
As described earlier, the air at ground level tends to be pulled in towards the thermal. This is a form of "wind" created by the thermal itself. If conditions are very calm, then a thermal can often be located easily simply by a shift in the wind. The wind will blow right towards the thermal, because in effect the wind IS the thermal. Take note of clues that will show wind shifts, and velocity, such as thermal poles with mylar streamers, bubbles, and far-off clues such as flags on flagpoles and windsocks.
When there is some significant general wind, the thermal's wind effect will interact. There often will still be some notable wind shifts, in both direction and velocity. Figure 5 shows the net vector of the combination of general wind and air pulled in by the thermal:
The air pulled in by the thermal changes the relative localized direction and/or velocity of the general wind. The relative wind direction along the sides of the thermal still tends to deflect left or right depending on thermal location, but not straight at the thermal as seen under calm conditions. For another drawing showing this same effect, see the Fig. 9 of the R/C Soaring column from the July '89 Model Builder, a copy of which was provided in the Oct '90 Technology Development mailing.
Two other areas of special note are the behavior of the leading and trailing edges of the thermal. The air pulled in at the leading edge of the thermal tends to cancel out some of the velocity of the general wind. In other words, as the thermal approaches you or equipment such as a thermal streamer, the wind will seem to get calmer. How calm will depend on how much air the thermal is pulling in, and the velocity of the general wind. For example here, let's say the general wind is 10 MPH and the thermal is strong enough to pull in air at about 5 MPH (this is only for understanding the concept, not reflecting true behavior. The intensity varies with the size of thermal and how close by the core is). For a time, the wind will tend to feel as though it has dropped from 10 to 5 MPH. As the core moves through this will tend to change, though it will depend on where the core is located relative to you and the strength and size of the rotating core (up to now the rotation effect of how the thermal affects wind has been ignored. It seems that a longer distances from the core the rotation is not noticeable enough to consider in this regard).
As the thermal passes by, then the opposite effect occurs. The general wind is added to by the air pulled in by the trailing edge of the thermal, so the wind becomes much stronger (in the previous example of 10 MPH wind and 5 MPH thermal air, the result would be about 15 MPH , tapering back to 10 MPH as the thermal drifts out of influencing local conditions).
Here is a more intriguing example which often works well on calmer days. Say for example the thermal still pulls in air at ground level at 5 MPH, but the general wind is only 3 MPH. In this case, when the thermal approaches the leading edge will actually cause the wind to shift 180° and blow "UPWIND" at 2 MPH. This may sound strange, but it does happen, as long as the thermal pulls in air faster than the general wind is blowing. For those of you who were are the NARAM-32 US Team SD flyoffs, you may recall a dust devil that came through. That dust devil was preceded by an approx. wind shift of 180° for almost 5 minutes. It missed the launch site by about 100-150 feet, 2-3 models were fired but ironically they failed to work for various reasons unrelated to thermals.
Even long before we began to care about thermals, we often have managed to accidentally pick thermals simply by "waiting for the wind to calm". At least so if the wind had calmed from normal. However, if the wind had picked up a lot from normal, then we were sometimes unwittingly avoiding the down air of a thermal that had already passed through.
If wind can help us find lift, it can also hurt a lot too. Higher winds harm the development potential of thermals, it is hard for a large mass of air to be significantly heated before being blown away from the heat source.
In addition to that there is the matter of turbulence. Turbulence can wreak havoc with thermal clues we try to use for detection, but even more basically they hurt thermals. Thermals form well in uniform air. The more turbulent the air, the less the warm air mass and the thermal can be maintained, if even formed at all. Thermals do exist on windy days, sometimes strong ones, but again they can be difficult to locate. In reading about a Free Flight World Championships about 10 years ago, the wind was so strong the US Team could not tell much from their thermal poles and other clues. So they just used the classic old method of waiting for the wind to drop, and hope that meant a thermal coming from upwind. Not a very confident way to go about it, unless things are so bad that the only other alternative is to flip a coin or roll dice on when to fly (and we've seen those kinds of days too).
On windier days it is possible for local topography to aid in the formation of thermals by the wind shadow effect. Simply put, something such as a tree-line or wooded area can shield the ground directly downwind from much of the strength of the wind. That calmer area can allow air at ground level to become more heated and more strongly formed before it pops off as a thermal. Natural depressions and very large manmade structures can also act to shadow the wind.
There are of course other forms of lift caused more directly and more consistently by wind, such as slope lift and wave lift. But only R/C models seem capable of being able to exploit this, even at that it is risky. Other models once through the slope lift would be caught in the turbulence and rotors behind the slope lift as they continue to drift downwind.
A Boomer every time?
Sometimes it is possible to come to expect the thermals to come right on to you so you can find them. If you expect to wait for that big "boomer" to come right over the launch pad, lots-of-luck. There indeed are many thermals around on most days, but very few become the large kind we think of as pushing their way up to form cumulus clouds, or to keep full-sized sailplanes flying. For every one of those big ones, there must be dozens (if not hundreds or thousands, depending on definition) of other thermals. All of varying strengths and longevity. Dave Thornburg once wrote about flying a hand launch sailplane and coming across a number of small thermal "bumps and burps" flying at 50 feet or less on a baseball-sized field. Temp/Wind recordings also seem to show a wide variety of thermal strengths and sizes (and unfortunately, never enough clues to really tell a moderate one from a big one real-time). Sometimes those recordings have shown cycles of temperature and wind activity of some kind (not necessarily thermals) as often as every 4-5 minutes, but again of widely varying strengths. And those were the clues that passed by just one spot, rarely were those from a thermal moving right by, but perhaps a thermal missing the launch site by a few hundred feet, or false clues.
The point of the above is that the really big thermals we all want are rare, if they come by they may be several hundred yards away. Perhaps R/C guys can go get one if they find the clues, but most other birds aren't going to have a chance at them (A rare catch a thermal that's gone by was done by Bob Parks quickly tilting the launcher for his PD model and launching after a strong thermal at the 1991 Team flyoffs. His bird just did manage to catch it, something like a streamer bird would have been a dead duck). There just are no big thermals coming right down the pike and towards the launch site very often, unless by chance a strong thermal triggering spot is directly upwind.
Equipment
The list of thermal equipment seems to grow all the time. First streamers, then thermometers, and lately bubbles (there's also the chart recorder approach for wind and temperature data, but that's not for those just learning). Indeed the free flight airplane guys have come up with a wide assortment of possible equipment, though the streamers, thermometers, and bubbles are the most popular (and in about that order it seems).
The best indicator of a thermal has nothing to do with ground equipment, it is a model in the air you are checking. Often this is somebody else's model, if it is in a thermal and your model can catch it then just fire and forget the rest. But piggybacking puts you at a disadvantage of missing whatever thermals may go by which are not shown by other models. As well, it is often difficult to tell a model is in a thermal until it is too late to fire your own to catch the same thermal. But nonetheless this is a key area to check. At the 1980 WSMC at Lakehurst there was a test firing area which allowed modelers to fire models during the contest, which the US Team exploited by firing some parachute duration models to test for thermals. Checking the air by using an R/C sailplane or electric glider has also been planned on occasion, though not carried out so far.
Thermal streamers
The most basic of equipment, and most useful, is the thermal streamer consisting of a tall pole mounted in the ground and a 1/4 mil mylar streamer about 1" wide as long as the pole or slightly longer. The higher the streamer is above the ground, the better, poles are usually at least 12 feet tall. Wal-Mart has some telescoping fiberglass fishing poles that are 14 feet tall costing about $12-14. There is also a 25 foot telescoping fiberglass fishing pole that can be bought for $30 from fishing supply catalogs. The 1/4 mil mylar can be unrolled from film capacitors or obtained from sources such as Apogee Components.
There is one big problem with a thermal pole. A pole, as in one pole, doesn't tell you a hell of a lot. More than nothing, but doesn't help in developing a feel for what the air is doing all around, only if there happens to be some air that makes the streamer at that one spot go up (which hopefully does show you a thermal). What is necessary to get a better handle on the air is to have several poles laid out, but this is rarely seen even at NARAMs. There were only 3 poles laid out at NARAM-32, and a couple of those were so close together they likely did not tell more than what one pole would have done, or as much as they could have if farther apart.
What is the ideal layout of thermal poles? Well, a grid of 10 by 10 poles, 100 in all, spaced 50-100 feet apart with the launch site somewhat downwind of center would be nice. But that's just wishful thinking. But the ideal layout would depend in part on how many poles are available to begin with. It simply must be assumed that more than a handful of thermal poles will be on hand for US Team flying, and that several people will help in setting them up and taking them down.
There are a number of possible pole layouts, depending on the number of poles available and people to set them up. Figure 6 shows examples of layouts using a minimum of 4 poles, 8 poles, and a semicircular layout of 12-17 poles. Eight seems like an optimal number, though it is obvious that 10-12 could be useful as well, with an additional pairs laid out at the sides of the launch site and another pair farther upwind, or some form of semicircular layered layout to better account for general wind shift in direction through the day.
An example of what the layout might indicate is shown in figure 7. As a thermal approaches the farthest pole may give the first clue of a thermal if the thermal passes near enough to it, as shift in wind direction or velocity or both (the need to tell velocity at long distance is why some form of windsock is desirable). And of course, if the wind has not shifted permanently to reduce the usefulness of the whole layout (it may be necessary sometime during the day to reposition a number of poles if the wind direction shifts permanently 90° or more. Or if there are enough poles, enough could be set up "downwind" and to the sides of the launch site to handle such shifts).
As shown in figure 7a, the first line of poles past the long range pole should help show significant direction shifts. In this example, the left pole points right and the center and right poles point left. Other poles may show some influence as well. In figure 7b, the thermal has passed beyond the second line of poles and is nearly alongside the launch site (it would be too ideal to show the thermal coming right over the launch site since far more thermals pass by rather than directly through).
Temperature Sensing
A few people are sensitive enough to feel minute changes in temperature, but for most of us some form of sensing device is useful. The primary device for sensing temperature is by using a digital thermometer, indoor/outdoor types having a wire lead for the outdoor sensor being preferred. One like that is made by Haverhills and others are sold through catalogs such as Heathkit or Edmond Scientific. Other brands may or may not be as useful.
We have not tried them, but Radio Shack sells an assembled indoor/outdoor thermometer for $15, and an LCD temperature indicator/controller module kit for $20 (the module is just about ready to use as-is, except for adding switches or buzzer for other features). Unless you would like the novelty of having the module kit set off an alarm when a certain temperature is reached or recording the highest temp, the assembled one is probably just as well. However, there is one significant problem with both Radio Shack thermometers, and possibly other types as well. Their thermistors are covered over by a metallic probe cover for protection, but which also tends to act as a heat sink. That would hurt the responsiveness of the thermistor too much, by the time the warmer air heated the cover and then the air in the cover probe heated the thermistor, the thermometer readings would lag significantly behind the actual air temperature. That is why the Haverhills type is so good, the small thermistor is left bare and is quite responsive.
Radio Shack sells a separate thermistor for $2, it is the same kind as used in the Haverhills thermometer (rated 10K ohms at 25°C). It MIGHT also be the thermistor used in one or both of the ones sold by Radio Shack. If so, the probe can be cut off and replaced by the bare thermistor. If anyone does this, let us know how it works out.
Something else of note about digital thermometers: sampling rate. For detecting thermals a sampling rate of at least once per second is desirable. Most seem to sample fast enough.
Furthermore, the thermometer should read to a tenth of a degree. Thermometers that measure only to the degree are not accurate enough and ones that read to the hundredth are too accurate.
Medical digital thermometers can be found at very low prices, $6 or less. They would need the same separate thermistor/probe bypass modification described above, but they may not be usable in any form. A test sample thermometer responded to temperatures in the 90-106° range. While that could have been used in Texas last year, weather usually is cooler so it would be useless. Perhaps other brands are not as limited in their capabilities.
OK, so you have a thermometer, now what? It is a good idea to make up a shield for the thermistor to protect it from sunlight. One kind of shield is shown in Figure 8 and is made from wood and styrofoam (foam 3/16" thick from a meat tray). The top disc is larger to help prevent light coming in at diagonal angles, and the top has a reflective covering to reduce heat absorption.
The use of a shield will help prevent getting false readings from heat induced by sunlight on the thermistor itself, after all the whole idea is for the thermistor to reflect only air temperature. Along similar lines, if you have a simple hand-held "thermal wand" (the thermometer on a 3-4' dowel), you should be consistent about how it is pointed in reference to the sun - especially if you do not use a shield.
Also beware of abnormal locations that can throw off the temperature reading. Setting up a thermistor on a car antenna might be convenient, but the heating of the car and pavement and how changes in wind allow or prevent that very localized heated air to be sensed by the thermometer could throw things off. Better to be out in a more open area. If the thermometer (or other thermistor heat sensor) is mounted to a pole it is preferable to mount the thermistor as high off the ground as possible to get a better reading of the air temperature, 10-15 feet is better than 4-6 feet.
As for looking for a thermal, it is important to develop a feel for the temperature readings you've seen in recent time. When thermals come and go the temperature tends to rise and fall. If the temperature is dropping, a thermal is not likely. If the temperature is rising, a thermal may be on the way. If the temperature is steady then it may be a period in between thermals, or it may be a thermal peaking if you have not been paying attention to what the temperature has been doing previously. This is where something such a a chart recorder becomes useful, in keeping track of temperature behavior and possible cycles.
When there seems to be random air with no thermal activity, the temperature will probably be relatively consistent, not changing much, or very quickly. On an average "good" day for thermals, when a thermal does come through there may be a rise of from 2 to as much as 4 degrees F, depending on the day, thermal strength, and nearness to the core. This is by not means an absolute, and on poorer days there may only be about a degree of change notable. Temperature is hard to go by sometimes, on calmer days the temperature may seem to get higher and higher, but only slowly. In those cases the problem is in firing too early before conditions have peaked. The ideal clues for a thermal to give off are a relatively rapid rise in temperature, which may mean the core of an existing thermal is nearing rather than a thermal bubble just beginning to form.
When a temperature rise seems to indicate a thermal, other clues should also be studied. Changes in wind direction and velocity which may help to locate the location, and when the thermal is nearer look for clues of upward air motion from streamers, bubbles, and whatever else is available. Temperature tends to drop rapidly after the thermal core passes through. If the temperature begins to drop you either need to fire right away if you think it is some lift you can use, or not fire at all. Once the temperature has begun to drop significantly and the wind picks up, the only thing you are likely to catch is massive down air. Then you'll have to start waiting for the whole cycle to repeat again, hopefully with something better.
Bubbles
You should have read before George Gassaway's notes on bubble machines, which was in the Oct '90 Technology Development mailing {Contact the authors on obtaining a copy of this article.}. If you do not yet have a machine, several are available from Apogee Components.
As for learning about thermal clues, you can go out to the flying field and just watch the bubble machine continuously without flying any models. By studying them long enough you may note particular behavior that may indicate a thermal. Even better if there is a thermal pole or two set up, and some other models in the air to help show what really is or is not a thermal.
The higher off the ground the bubble machine is, the better it will interact with the air to show lift. Six feet would be good, though difficult to refill above eye level. If the bubble machine is mounted on a tripod for ease of repositioning due to permanent wind shifts, such high mounting will probably have to be sacrificed as most tripods are only 3-4 feet tall.
As for location, if you have one machine it is good to set it up at some distance upwind of the launch site, say 100 feet on a low wind day and somewhat more on windier days so there is time to identify a thermal before it has come by the launch site. Locating it longer distances away is somewhat of a problem in frequently turning it on and off, to conserve batteries/liquid and also for strategic reasons (for US Team flying it would be desirable to have the bubble machines running only when needed for picking air for a US Team member, and having them off the rest of the time). With more bubble machines, like poles, various layouts can also be used. If you have two machines, one can be far upwind, the other very close to the pad area for convenience. In the case of US Team flying the bubble machine layout could be planned in conjunction with the thermal pole layout.
The initial clues given off by bubbles will be shifts in wind direction, which may indicate the approach of a thermal. Upward movement of the bubbles is a very good sign, though do not be confused by turbulence that randomly makes the bubbles rise a bit, look for something more definitive. If the bubbles rise up about 20 feet, that may be lift, if they rise toward 50 feet and seem to be rising rapidly it must be lift! As will all thermal picking, look for other clues as well to help confirm what seems to be lift.
On some rare occasions you may see another good sign. The bubbles moving around in a horizontal circular pattern. Assuming this is in an open area, and not turbulence off an upwind structure or line of cars, this most likely is the core of the thermal becoming visible by means of the bubbles. On one occasion the bubbles have been seen to be pulled up in a rotating spiral, as the core went right by a bubble machine.
On the flip side, if bubbles just drift along the ground without rising there is no lift. If the bubbles do not even drift far but drift into the ground and pop there is no lift and possibly even down air. On windier days the bubbles may be of little or no use at all due to turbulence.
One thing a bubble machine is good for aside from finding thermals is to gain an understanding of how complex the air behaves in direction, velocity, and stability. It is likely that anyone who gets a bubble machine will spend some significant time either "testing" or "playing" with the machine at home, outdoors. The contours of residential areas does not make for any kind of logical learning about thermals. But while testing out the machine operation, bubble liquid types, and so on, you can notice how the bubble drift and dispersal changes a lot. Unless a particularly windy day the wind direction changes frequently, and updrafts occur to take the bubbles up. You can also even make the bubbles "slope soar" up and over a house or building. Observing the drift of the bubbles may give you a better feel for how variable the wind really is, and how it interacts with surface obstacles even on a micro-meteorological scale.
Other equipment and clues
An outgrowth of the thermal pole is the thermal balloon. Such as a 3' dia balloon with a few dozen yards of line, with mylar streamers attached to a number of locations on the line. Such an arrangement can show air behavior more completely at different altitudes. However, this is not so easy to arrange to do, and has only been known to have been done at the 1980 WSMC in Lakehurst. Perhaps we should try it again!
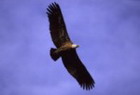
Natural signs can be used to help locate lift. Trees can be observed for changes in wind velocity, as can other objects affected by wind (look for flagpoles as well). Birds can be useful; birds that soar are obvious for showing a thermal. Another way is for non-soaring birds to be seen flitting around in the same area of sky anywhere form 20 to 100 feet up, catching bugs that have been picked up by a thermal. Bird clues cannot be relied to occur, but when they do occur should be recognized as possible strong signs.
Your surroundings can give off clues also. Sometimes noticing how a field of grass, wheat, or corn sways will graphically depict a thermal. From this, just enlarge your field and look at trees and side objects. Then time the launch to hit the thermal.
Final comments
If you're on the US Team flying duration, you ought to have at least one thermal pole, if not more, and bring it to be used at FAI contests. And help set up some of the thermal gear such as the poles, even if only 1-2 people are in "charge" of picking thermals, there is always a need for help before and after the event for setting up and packing gear.
Under FAI round type flying where there is often no more than 20 minutes for each team member to fly, there may not even be one decent thermal, so the strategic impact of waiting too long has to be considered too, passing up something moderate in hopes of something big can be a big gamble. The first person up for the round cannot wait 30 minutes and then leave only an average of 15 minutes for his teammates to fly in (unless it is round three and only one member has a shot at a medal or making the flyoffs. Then the manager might allow that flier to have special priority on when he goes or how long to wait). This also puts a premium on getting your model ready to fly at the beginning of the round if you are first up, or to be ready to put your model on the pad the moment the team member in front of you has launched. Medals have literally been won or lost this way.
When deciding when to go, also keep in mind how fast the thermal is drifting and how slow the launch crew may be. Some crews are fast, some are slow. It does no good to pick the perfect thermal, wait to the last moment to signal to launch, and have the model launched 20-30 seconds later when the thermal may have passed through. Fortunately on most FAI type ranges the crews are ready to launch quickly.
Unfortunately, NAR competition does not recognize the precise launch timing required of thermal hunting. In fact, I have had many an angry LCO tell me to get off the pad unless I flew right away. So to really utilize thermals, practice on your own, or fly in a true FAI contest; one with timers assigned specifically to you and an LCO that will launch your model with a three second countdown.
No ja mogoče pa ni malo
By George Gassaway and Ken Mizoi
Usually in competition we look for anything that can help keep our models in the air for a longer time than they would get by themselves. It doesn't really matter what it is that helps, whether it is a thermal, wave lift, slope soaring, whatever. For purposes of our discussion, the types of lift discussed will be mostly of the thermal type. That in itself is hard enough to describe adequately.
This is also meant as a supplement to other articles about thermals. There is not much need to restate all that is described just as well in other sources. One great resource is an article written by Bill Forrey {see references}.
One of the big problems about discussing thermals is that there are several kinds of thermals, of varying strengths, and numerous theories and tips from other experts which do not necessarily agree. There are so many that to try to remember and analyze it all is just about impossible, it is hard to ever even know what KIND of thermal your model caught (or missed, as the case may be). It is also very difficult for someone to try to describe what they tend to look for, as it is often a combination of factors at a given moment, some of which may be subconscious concepts. Thermals are very hard to quantify, which is notable by how no two thermal articles seem to be alike. Every person has their own concept of thermal types and how to use them.
Or as some people have described it, it is a "Black Art". The only real way to learn is to read all you can, pick up what you seem to be able to keep track of for learning, get your own detection gear such as a thermal pole to learn with locally, start paying lots of attention to what the air is doing on the field, and note what theories and techniques work well enough for you to become somewhat consistent spotting thermals.
Thermal Heating
Thermals are formed by a difference in temperature of the air, and as we all know, hot air rises. It does not have to be "hot" or even warm though, thermals can form in winter if there is sufficient means for some cold air to become less cold than the surrounding air. Air does not retain or absorb heat well, it has to be heated by some means - generally by the ground. In most cases, the ground is heated by the sun, then the air at ground level is itself heated by contact with the ground.
The sun is usually the key to thermals. Ideal sun conditions are clear blue sky with the sun high in elevation, such as near noon. Highest maximum elevation occurs in late June, thermals do tend to be stronger in late spring and early summer than at other times of year. Thermal activity usually starts up around 9-10 AM and dies off by 4-5 PM. Contests are usually flown during that time frame anyway. The "prime time" hours are often between 11 and 3 PM, when the strongest thermals of the day usually occur. During NAR contests this can be exploited, during FAI contests it is harder to make use of since the rounds determine when you fly. Even if a day starts off nice and clear, it may very likely become partly cloudy later on as some of the larger thermals form cumulus clouds. They may even form into late afternoon showers or thundershowers. As such, it may be risky to wait too long in the day to fly some events at NAR meets.
On partly cloudy days there will be less sunlight delivered, and generally weaker thermals. Sometimes fliers wait for a cloud to pass by to reheat the ground and help form a new thermal. However, such a cycle can take a long time, at a NARAM you can literally have all day to wait for that if you want to, but under rigid round flying there probably will not be time. How long it takes the ground to reheat and form a thermal can range from several minutes to never, though if you plan to wait it out it will probably be at least 5-10 minutes after the sun reappears. Under most FAI round time frames, there may not be time to wait it out though.
Topography makes a major difference in how much and to what strength thermals can be formed. The best sites are those which absorb heat well, such as a plowed field or area with a lot of paved surface, surrounded by areas which do not absorb heat well, such as forests and areas with a lot of plant life. A farmer's field is great if it's been plowed under, the rough ground even presents more surface area to absorb heat from sunlight. But that same farmer's field could also be a "black hole" if it's planted with crops. Humidity also plays a role, the more humidity the less activity there is and the cooler some sites may tend to be. This is why some of those "Texas-sized" thermals get to be so strong, not just the capability of a lot of hot spots. Some of you may have noted it was less humid in Dallas than at NARAMs flown in Houston, Orlando, or Manassas. Similarly, flying over a pond or lake would not be a good idea in general through the day, although in late afternoon it might generate some lift as the ground cools but the water retains heat longer. A similar "heat sink" effect can occur from paved areas retaining heat late in the day or after the sun has been replaced by a buildup of cloud overcast.
Back to sites, what we often fly from tend to help generate thermals, or add to ones that have drifted from elsewhere "upwind". Rocket sites usually have short grass, tall weeds, dirt, pavement, or a mix of several of these (the tall weeds and grass is not so ideal, but often better than surrounding areas). Sites with a significant amount of paved areas tend to help generate good thermal activity, as the pavement absorbs heat from the sunlight better than other surfaces.
All of this helps to form a heated mass of air, laying underneath cooler air. Eventually something will trigger the warm air layer to rise upward.
Thermal Formation
When the air is heated enough, or the amount of warmer air is large enough, it will tend to bulge upward. As it does, it will displace some of the cooler air. This bulge will become larger, into a bubble which bursts through the cooler air. This rising bubble is a thermal, though in an early form. This bubble usually tends to form into a vortex ring, like a "smoke ring" . If the bubble or ring loses all contact with the ground, it will truly rise like a bubble, and be virtually impossible to detect from the ground. The only way of detecting that would be to happen to fly a model into one, unless the thermal happened to be detected as it was forming or breaking away from the ground.
Stronger thermals usually do keep contact with the ground, via a rotating column which helps to feed the thermal. This column is sometimes visible by the dust kicked up by it.. If the warm or "hot" spot that formed the thermal warms up additional air quickly enough, and/or if the wind is not too strong or turbulent, the column may stay connected to the source and create a virtually stationary thermal. Unfortunately this is rare. More often, the thermal drifts downwind on its own, picking up more warm air as it goes. It may help to create warm air by its own influence of calming the wind in the direction it is drifting towards, allowing the air in front of it to become more heated, or it may simply "harvest" other warm spot areas which have not yet burst through but are warm enough to feed the thermal as it goes by.
The kinds of thermals we often seem to pick are ones that are of the forming bubble or the developed column variety. Both give off clues of warmer air, shifts in wind, and of course, rising air.
As the bubbles, or the columns, pull in air from ground level, there is a tendency for the air at ground level to move towards the bubble center or thermal column core. After all, if there is warm air rising, air must come in to replace it. Also remember that where there is air rising, there is also air falling, at the outer fringes of rising air there is falling air or "sink". Notice the top view in figure 4 how much air is affected around the core It can be deadly to get caught in sink if you miss the thermal. That's what makes this such a risky venture.
As air is pulled in from the sides at ground level, it often rotates. A just forming bubble may not show such a clue, but a thermal column cannot exist without it. The rotation is usually, though not always, counter-clockwise. The size of the column core varies greatly, sometimes just 1-2 feet in diameter of a weak thermal, sometimes a hundred feet more more at ground level (the area of rising air is much wider than the column, especially at higher altitudes, though just how wide cannot be said) . Beyond that rotating column "wall" though, there usually does not seem to be much notable rotation.
Wind
It is important to become attuned to the behavior of the wind, as that is one of the most useful clues in trying to locate a thermal. It is important to note direction, velocity, smoothness or turbulence, and most importantly, when and why it changes direction and/or velocity. And never think that the wind is "blowing down the field"; the chances of the wind blowing in a particular direction are one in 360, as in 360 degrees. The wind is going to blow whatever direction it wants to, regardless of what the shape of the flying field is like or your concepts of where it "ought" to go.
One of the first things to make note of on the field is the wind direction and velocity. Keep a mental note of the direction and velocity, to develop a feel for what is the general wind direction and intensity. Throughout the day the wind will usually become stronger (until later afternoon when thermal activity also dies down), and the direction may permanently shift, so that you'll need to update your impression of the general wind, its general behavior in the previous hour (or even half hour) is of more value than what it was like 3-4 hours before. The reason the general wind direction changes significantly through the day can be due to several factors, such as approaching pressure and weather fronts. In lighter wind conditions, the wind can shift due to interaction of the region's topography and weather. It helps to check the weather forecasts for what the expected weather for the day is supposed to be, including wind direction and strength. If the wind direction is significantly different from what it is supposed to be, you'll know to be aware of a likely permanent shift later in the day.
The reason for getting a feel for the general wind is that thermals cause localized changes in the wind. The thermals are pushed along by the general wind, but do create their own apparent shifts in wind. Those shifts in wind can be used to help in locating a thermal. However the shifts can tell you very little, and could be misleading, if you do not have a good feel for the general wind to compare it to. Otherwise you won't know how or why it's different.
As described earlier, the air at ground level tends to be pulled in towards the thermal. This is a form of "wind" created by the thermal itself. If conditions are very calm, then a thermal can often be located easily simply by a shift in the wind. The wind will blow right towards the thermal, because in effect the wind IS the thermal. Take note of clues that will show wind shifts, and velocity, such as thermal poles with mylar streamers, bubbles, and far-off clues such as flags on flagpoles and windsocks.
When there is some significant general wind, the thermal's wind effect will interact. There often will still be some notable wind shifts, in both direction and velocity. Figure 5 shows the net vector of the combination of general wind and air pulled in by the thermal:
The air pulled in by the thermal changes the relative localized direction and/or velocity of the general wind. The relative wind direction along the sides of the thermal still tends to deflect left or right depending on thermal location, but not straight at the thermal as seen under calm conditions. For another drawing showing this same effect, see the Fig. 9 of the R/C Soaring column from the July '89 Model Builder, a copy of which was provided in the Oct '90 Technology Development mailing.
Two other areas of special note are the behavior of the leading and trailing edges of the thermal. The air pulled in at the leading edge of the thermal tends to cancel out some of the velocity of the general wind. In other words, as the thermal approaches you or equipment such as a thermal streamer, the wind will seem to get calmer. How calm will depend on how much air the thermal is pulling in, and the velocity of the general wind. For example here, let's say the general wind is 10 MPH and the thermal is strong enough to pull in air at about 5 MPH (this is only for understanding the concept, not reflecting true behavior. The intensity varies with the size of thermal and how close by the core is). For a time, the wind will tend to feel as though it has dropped from 10 to 5 MPH. As the core moves through this will tend to change, though it will depend on where the core is located relative to you and the strength and size of the rotating core (up to now the rotation effect of how the thermal affects wind has been ignored. It seems that a longer distances from the core the rotation is not noticeable enough to consider in this regard).
As the thermal passes by, then the opposite effect occurs. The general wind is added to by the air pulled in by the trailing edge of the thermal, so the wind becomes much stronger (in the previous example of 10 MPH wind and 5 MPH thermal air, the result would be about 15 MPH , tapering back to 10 MPH as the thermal drifts out of influencing local conditions).
Here is a more intriguing example which often works well on calmer days. Say for example the thermal still pulls in air at ground level at 5 MPH, but the general wind is only 3 MPH. In this case, when the thermal approaches the leading edge will actually cause the wind to shift 180° and blow "UPWIND" at 2 MPH. This may sound strange, but it does happen, as long as the thermal pulls in air faster than the general wind is blowing. For those of you who were are the NARAM-32 US Team SD flyoffs, you may recall a dust devil that came through. That dust devil was preceded by an approx. wind shift of 180° for almost 5 minutes. It missed the launch site by about 100-150 feet, 2-3 models were fired but ironically they failed to work for various reasons unrelated to thermals.
Even long before we began to care about thermals, we often have managed to accidentally pick thermals simply by "waiting for the wind to calm". At least so if the wind had calmed from normal. However, if the wind had picked up a lot from normal, then we were sometimes unwittingly avoiding the down air of a thermal that had already passed through.
If wind can help us find lift, it can also hurt a lot too. Higher winds harm the development potential of thermals, it is hard for a large mass of air to be significantly heated before being blown away from the heat source.
In addition to that there is the matter of turbulence. Turbulence can wreak havoc with thermal clues we try to use for detection, but even more basically they hurt thermals. Thermals form well in uniform air. The more turbulent the air, the less the warm air mass and the thermal can be maintained, if even formed at all. Thermals do exist on windy days, sometimes strong ones, but again they can be difficult to locate. In reading about a Free Flight World Championships about 10 years ago, the wind was so strong the US Team could not tell much from their thermal poles and other clues. So they just used the classic old method of waiting for the wind to drop, and hope that meant a thermal coming from upwind. Not a very confident way to go about it, unless things are so bad that the only other alternative is to flip a coin or roll dice on when to fly (and we've seen those kinds of days too).
On windier days it is possible for local topography to aid in the formation of thermals by the wind shadow effect. Simply put, something such as a tree-line or wooded area can shield the ground directly downwind from much of the strength of the wind. That calmer area can allow air at ground level to become more heated and more strongly formed before it pops off as a thermal. Natural depressions and very large manmade structures can also act to shadow the wind.
There are of course other forms of lift caused more directly and more consistently by wind, such as slope lift and wave lift. But only R/C models seem capable of being able to exploit this, even at that it is risky. Other models once through the slope lift would be caught in the turbulence and rotors behind the slope lift as they continue to drift downwind.
A Boomer every time?
Sometimes it is possible to come to expect the thermals to come right on to you so you can find them. If you expect to wait for that big "boomer" to come right over the launch pad, lots-of-luck. There indeed are many thermals around on most days, but very few become the large kind we think of as pushing their way up to form cumulus clouds, or to keep full-sized sailplanes flying. For every one of those big ones, there must be dozens (if not hundreds or thousands, depending on definition) of other thermals. All of varying strengths and longevity. Dave Thornburg once wrote about flying a hand launch sailplane and coming across a number of small thermal "bumps and burps" flying at 50 feet or less on a baseball-sized field. Temp/Wind recordings also seem to show a wide variety of thermal strengths and sizes (and unfortunately, never enough clues to really tell a moderate one from a big one real-time). Sometimes those recordings have shown cycles of temperature and wind activity of some kind (not necessarily thermals) as often as every 4-5 minutes, but again of widely varying strengths. And those were the clues that passed by just one spot, rarely were those from a thermal moving right by, but perhaps a thermal missing the launch site by a few hundred feet, or false clues.
The point of the above is that the really big thermals we all want are rare, if they come by they may be several hundred yards away. Perhaps R/C guys can go get one if they find the clues, but most other birds aren't going to have a chance at them (A rare catch a thermal that's gone by was done by Bob Parks quickly tilting the launcher for his PD model and launching after a strong thermal at the 1991 Team flyoffs. His bird just did manage to catch it, something like a streamer bird would have been a dead duck). There just are no big thermals coming right down the pike and towards the launch site very often, unless by chance a strong thermal triggering spot is directly upwind.
Equipment
The list of thermal equipment seems to grow all the time. First streamers, then thermometers, and lately bubbles (there's also the chart recorder approach for wind and temperature data, but that's not for those just learning). Indeed the free flight airplane guys have come up with a wide assortment of possible equipment, though the streamers, thermometers, and bubbles are the most popular (and in about that order it seems).
The best indicator of a thermal has nothing to do with ground equipment, it is a model in the air you are checking. Often this is somebody else's model, if it is in a thermal and your model can catch it then just fire and forget the rest. But piggybacking puts you at a disadvantage of missing whatever thermals may go by which are not shown by other models. As well, it is often difficult to tell a model is in a thermal until it is too late to fire your own to catch the same thermal. But nonetheless this is a key area to check. At the 1980 WSMC at Lakehurst there was a test firing area which allowed modelers to fire models during the contest, which the US Team exploited by firing some parachute duration models to test for thermals. Checking the air by using an R/C sailplane or electric glider has also been planned on occasion, though not carried out so far.
Thermal streamers
The most basic of equipment, and most useful, is the thermal streamer consisting of a tall pole mounted in the ground and a 1/4 mil mylar streamer about 1" wide as long as the pole or slightly longer. The higher the streamer is above the ground, the better, poles are usually at least 12 feet tall. Wal-Mart has some telescoping fiberglass fishing poles that are 14 feet tall costing about $12-14. There is also a 25 foot telescoping fiberglass fishing pole that can be bought for $30 from fishing supply catalogs. The 1/4 mil mylar can be unrolled from film capacitors or obtained from sources such as Apogee Components.
There is one big problem with a thermal pole. A pole, as in one pole, doesn't tell you a hell of a lot. More than nothing, but doesn't help in developing a feel for what the air is doing all around, only if there happens to be some air that makes the streamer at that one spot go up (which hopefully does show you a thermal). What is necessary to get a better handle on the air is to have several poles laid out, but this is rarely seen even at NARAMs. There were only 3 poles laid out at NARAM-32, and a couple of those were so close together they likely did not tell more than what one pole would have done, or as much as they could have if farther apart.
What is the ideal layout of thermal poles? Well, a grid of 10 by 10 poles, 100 in all, spaced 50-100 feet apart with the launch site somewhat downwind of center would be nice. But that's just wishful thinking. But the ideal layout would depend in part on how many poles are available to begin with. It simply must be assumed that more than a handful of thermal poles will be on hand for US Team flying, and that several people will help in setting them up and taking them down.
There are a number of possible pole layouts, depending on the number of poles available and people to set them up. Figure 6 shows examples of layouts using a minimum of 4 poles, 8 poles, and a semicircular layout of 12-17 poles. Eight seems like an optimal number, though it is obvious that 10-12 could be useful as well, with an additional pairs laid out at the sides of the launch site and another pair farther upwind, or some form of semicircular layered layout to better account for general wind shift in direction through the day.
An example of what the layout might indicate is shown in figure 7. As a thermal approaches the farthest pole may give the first clue of a thermal if the thermal passes near enough to it, as shift in wind direction or velocity or both (the need to tell velocity at long distance is why some form of windsock is desirable). And of course, if the wind has not shifted permanently to reduce the usefulness of the whole layout (it may be necessary sometime during the day to reposition a number of poles if the wind direction shifts permanently 90° or more. Or if there are enough poles, enough could be set up "downwind" and to the sides of the launch site to handle such shifts).
As shown in figure 7a, the first line of poles past the long range pole should help show significant direction shifts. In this example, the left pole points right and the center and right poles point left. Other poles may show some influence as well. In figure 7b, the thermal has passed beyond the second line of poles and is nearly alongside the launch site (it would be too ideal to show the thermal coming right over the launch site since far more thermals pass by rather than directly through).
Temperature Sensing
A few people are sensitive enough to feel minute changes in temperature, but for most of us some form of sensing device is useful. The primary device for sensing temperature is by using a digital thermometer, indoor/outdoor types having a wire lead for the outdoor sensor being preferred. One like that is made by Haverhills and others are sold through catalogs such as Heathkit or Edmond Scientific. Other brands may or may not be as useful.
We have not tried them, but Radio Shack sells an assembled indoor/outdoor thermometer for $15, and an LCD temperature indicator/controller module kit for $20 (the module is just about ready to use as-is, except for adding switches or buzzer for other features). Unless you would like the novelty of having the module kit set off an alarm when a certain temperature is reached or recording the highest temp, the assembled one is probably just as well. However, there is one significant problem with both Radio Shack thermometers, and possibly other types as well. Their thermistors are covered over by a metallic probe cover for protection, but which also tends to act as a heat sink. That would hurt the responsiveness of the thermistor too much, by the time the warmer air heated the cover and then the air in the cover probe heated the thermistor, the thermometer readings would lag significantly behind the actual air temperature. That is why the Haverhills type is so good, the small thermistor is left bare and is quite responsive.
Radio Shack sells a separate thermistor for $2, it is the same kind as used in the Haverhills thermometer (rated 10K ohms at 25°C). It MIGHT also be the thermistor used in one or both of the ones sold by Radio Shack. If so, the probe can be cut off and replaced by the bare thermistor. If anyone does this, let us know how it works out.
Something else of note about digital thermometers: sampling rate. For detecting thermals a sampling rate of at least once per second is desirable. Most seem to sample fast enough.
Furthermore, the thermometer should read to a tenth of a degree. Thermometers that measure only to the degree are not accurate enough and ones that read to the hundredth are too accurate.
Medical digital thermometers can be found at very low prices, $6 or less. They would need the same separate thermistor/probe bypass modification described above, but they may not be usable in any form. A test sample thermometer responded to temperatures in the 90-106° range. While that could have been used in Texas last year, weather usually is cooler so it would be useless. Perhaps other brands are not as limited in their capabilities.
OK, so you have a thermometer, now what? It is a good idea to make up a shield for the thermistor to protect it from sunlight. One kind of shield is shown in Figure 8 and is made from wood and styrofoam (foam 3/16" thick from a meat tray). The top disc is larger to help prevent light coming in at diagonal angles, and the top has a reflective covering to reduce heat absorption.
The use of a shield will help prevent getting false readings from heat induced by sunlight on the thermistor itself, after all the whole idea is for the thermistor to reflect only air temperature. Along similar lines, if you have a simple hand-held "thermal wand" (the thermometer on a 3-4' dowel), you should be consistent about how it is pointed in reference to the sun - especially if you do not use a shield.
Also beware of abnormal locations that can throw off the temperature reading. Setting up a thermistor on a car antenna might be convenient, but the heating of the car and pavement and how changes in wind allow or prevent that very localized heated air to be sensed by the thermometer could throw things off. Better to be out in a more open area. If the thermometer (or other thermistor heat sensor) is mounted to a pole it is preferable to mount the thermistor as high off the ground as possible to get a better reading of the air temperature, 10-15 feet is better than 4-6 feet.
As for looking for a thermal, it is important to develop a feel for the temperature readings you've seen in recent time. When thermals come and go the temperature tends to rise and fall. If the temperature is dropping, a thermal is not likely. If the temperature is rising, a thermal may be on the way. If the temperature is steady then it may be a period in between thermals, or it may be a thermal peaking if you have not been paying attention to what the temperature has been doing previously. This is where something such a a chart recorder becomes useful, in keeping track of temperature behavior and possible cycles.
When there seems to be random air with no thermal activity, the temperature will probably be relatively consistent, not changing much, or very quickly. On an average "good" day for thermals, when a thermal does come through there may be a rise of from 2 to as much as 4 degrees F, depending on the day, thermal strength, and nearness to the core. This is by not means an absolute, and on poorer days there may only be about a degree of change notable. Temperature is hard to go by sometimes, on calmer days the temperature may seem to get higher and higher, but only slowly. In those cases the problem is in firing too early before conditions have peaked. The ideal clues for a thermal to give off are a relatively rapid rise in temperature, which may mean the core of an existing thermal is nearing rather than a thermal bubble just beginning to form.
When a temperature rise seems to indicate a thermal, other clues should also be studied. Changes in wind direction and velocity which may help to locate the location, and when the thermal is nearer look for clues of upward air motion from streamers, bubbles, and whatever else is available. Temperature tends to drop rapidly after the thermal core passes through. If the temperature begins to drop you either need to fire right away if you think it is some lift you can use, or not fire at all. Once the temperature has begun to drop significantly and the wind picks up, the only thing you are likely to catch is massive down air. Then you'll have to start waiting for the whole cycle to repeat again, hopefully with something better.
Bubbles
You should have read before George Gassaway's notes on bubble machines, which was in the Oct '90 Technology Development mailing {Contact the authors on obtaining a copy of this article.}. If you do not yet have a machine, several are available from Apogee Components.
As for learning about thermal clues, you can go out to the flying field and just watch the bubble machine continuously without flying any models. By studying them long enough you may note particular behavior that may indicate a thermal. Even better if there is a thermal pole or two set up, and some other models in the air to help show what really is or is not a thermal.
The higher off the ground the bubble machine is, the better it will interact with the air to show lift. Six feet would be good, though difficult to refill above eye level. If the bubble machine is mounted on a tripod for ease of repositioning due to permanent wind shifts, such high mounting will probably have to be sacrificed as most tripods are only 3-4 feet tall.
As for location, if you have one machine it is good to set it up at some distance upwind of the launch site, say 100 feet on a low wind day and somewhat more on windier days so there is time to identify a thermal before it has come by the launch site. Locating it longer distances away is somewhat of a problem in frequently turning it on and off, to conserve batteries/liquid and also for strategic reasons (for US Team flying it would be desirable to have the bubble machines running only when needed for picking air for a US Team member, and having them off the rest of the time). With more bubble machines, like poles, various layouts can also be used. If you have two machines, one can be far upwind, the other very close to the pad area for convenience. In the case of US Team flying the bubble machine layout could be planned in conjunction with the thermal pole layout.
The initial clues given off by bubbles will be shifts in wind direction, which may indicate the approach of a thermal. Upward movement of the bubbles is a very good sign, though do not be confused by turbulence that randomly makes the bubbles rise a bit, look for something more definitive. If the bubbles rise up about 20 feet, that may be lift, if they rise toward 50 feet and seem to be rising rapidly it must be lift! As will all thermal picking, look for other clues as well to help confirm what seems to be lift.
On some rare occasions you may see another good sign. The bubbles moving around in a horizontal circular pattern. Assuming this is in an open area, and not turbulence off an upwind structure or line of cars, this most likely is the core of the thermal becoming visible by means of the bubbles. On one occasion the bubbles have been seen to be pulled up in a rotating spiral, as the core went right by a bubble machine.
On the flip side, if bubbles just drift along the ground without rising there is no lift. If the bubbles do not even drift far but drift into the ground and pop there is no lift and possibly even down air. On windier days the bubbles may be of little or no use at all due to turbulence.
One thing a bubble machine is good for aside from finding thermals is to gain an understanding of how complex the air behaves in direction, velocity, and stability. It is likely that anyone who gets a bubble machine will spend some significant time either "testing" or "playing" with the machine at home, outdoors. The contours of residential areas does not make for any kind of logical learning about thermals. But while testing out the machine operation, bubble liquid types, and so on, you can notice how the bubble drift and dispersal changes a lot. Unless a particularly windy day the wind direction changes frequently, and updrafts occur to take the bubbles up. You can also even make the bubbles "slope soar" up and over a house or building. Observing the drift of the bubbles may give you a better feel for how variable the wind really is, and how it interacts with surface obstacles even on a micro-meteorological scale.
Other equipment and clues
An outgrowth of the thermal pole is the thermal balloon. Such as a 3' dia balloon with a few dozen yards of line, with mylar streamers attached to a number of locations on the line. Such an arrangement can show air behavior more completely at different altitudes. However, this is not so easy to arrange to do, and has only been known to have been done at the 1980 WSMC in Lakehurst. Perhaps we should try it again!
Natural signs can be used to help locate lift. Trees can be observed for changes in wind velocity, as can other objects affected by wind (look for flagpoles as well). Birds can be useful; birds that soar are obvious for showing a thermal. Another way is for non-soaring birds to be seen flitting around in the same area of sky anywhere form 20 to 100 feet up, catching bugs that have been picked up by a thermal. Bird clues cannot be relied to occur, but when they do occur should be recognized as possible strong signs.
Your surroundings can give off clues also. Sometimes noticing how a field of grass, wheat, or corn sways will graphically depict a thermal. From this, just enlarge your field and look at trees and side objects. Then time the launch to hit the thermal.
Final comments
If you're on the US Team flying duration, you ought to have at least one thermal pole, if not more, and bring it to be used at FAI contests. And help set up some of the thermal gear such as the poles, even if only 1-2 people are in "charge" of picking thermals, there is always a need for help before and after the event for setting up and packing gear.
Under FAI round type flying where there is often no more than 20 minutes for each team member to fly, there may not even be one decent thermal, so the strategic impact of waiting too long has to be considered too, passing up something moderate in hopes of something big can be a big gamble. The first person up for the round cannot wait 30 minutes and then leave only an average of 15 minutes for his teammates to fly in (unless it is round three and only one member has a shot at a medal or making the flyoffs. Then the manager might allow that flier to have special priority on when he goes or how long to wait). This also puts a premium on getting your model ready to fly at the beginning of the round if you are first up, or to be ready to put your model on the pad the moment the team member in front of you has launched. Medals have literally been won or lost this way.
When deciding when to go, also keep in mind how fast the thermal is drifting and how slow the launch crew may be. Some crews are fast, some are slow. It does no good to pick the perfect thermal, wait to the last moment to signal to launch, and have the model launched 20-30 seconds later when the thermal may have passed through. Fortunately on most FAI type ranges the crews are ready to launch quickly.
Unfortunately, NAR competition does not recognize the precise launch timing required of thermal hunting. In fact, I have had many an angry LCO tell me to get off the pad unless I flew right away. So to really utilize thermals, practice on your own, or fly in a true FAI contest; one with timers assigned specifically to you and an LCO that will launch your model with a three second countdown.
No ja mogoče pa ni malo
-
MC GAYVER - Stara sablja
- Prispevkov: 1522
- Pridružen: 06.03.2003, 18:18
- Kraj: Ljubljana
![]() Napisal/-a Robi » 29.10.2004, 13:58
Napisal/-a Robi » 29.10.2004, 13:58
Teorija, občutki in model striman v nulo so glavni pogoj za dobro izkoriščanje termike. Vsi trije elementi so tesno povezani med sabo. Vsega tega pa se skoraj ne da osvojiti samo v eni sezoni, saj se sproti učimo in nabiramo novih izkušenj. V zraki niso nikoli identično enaki pogoji.
LP, Robi
LP, Robi
-
Robi - Forumski veteran
- Prispevkov: 521
- Pridružen: 15.08.2003, 10:58
- Kraj: Idrija
![]() Napisal/-a Intruder » 29.10.2004, 14:39
Napisal/-a Intruder » 29.10.2004, 14:39
McGayver
Potreboval sem 45 min, da sem to prebral in prevedel. Huh....boli me glava! Ampak je vsekakor poučno.
http://www.aspirin.com
Jan
Potreboval sem 45 min, da sem to prebral in prevedel. Huh....boli me glava!
http://www.aspirin.com
Jan
Slope soaring is the way of life! (J.P.)
-
Intruder - Forumski veteran
- Prispevkov: 531
- Pridružen: 25.08.2004, 23:34
- Kraj: Maribor
Re: Jadranje v termiki
![]() Napisal/-a Letme » 29.10.2004, 17:24
Napisal/-a Letme » 29.10.2004, 17:24
V Telstare bi moral dati karbonse palčke
Termika pa povsod tam kjer se topel zrak dviga. Tud nad avtomobili
karbonske palčke v spoje med deli krila misliš? Morda še kakšni predlogi?
MC GAYVER napisal/-a::D
Saj sem tudi hotel teorijo... uglavnem najlepša hvala za tako izčrpno teoretično osnovo - sedaj vsaj vem kje in kako se išče termalne stebre in ostale zadevšne ter kako se lahko na tekmi malce "pošlepaš" na znanju drugih
Zaenkrat sem zvedel veliko več kot sem pričakoval bi pa tudi prosil, če bi lahko nastal na forumu kakšen spisek naših opažanj, kje se pojavljajo sebri in kje ne: npr. sedaj smo izvedeli da nad avtomobili, zoranimi polji, peščenimi tlemi, asfaltom - spuščanja pa so nad gozdovi in polji posejanimi s poljščinami. Seveda pričakujem, da se bo še kakšna kombinacija dodala (vsekakor pa se mi zdi, da boste tista skrita mesta rajši zadržali zase)
I cannot do anything without fear
-
Letme - Novinec
- Prispevkov: 28
- Pridružen: 26.10.2004, 22:19
- Kraj: Ljubljana
![]() Napisal/-a mihah » 29.10.2004, 17:55
Napisal/-a mihah » 29.10.2004, 17:55
Jaz sem tudi hotel na začetku neko tako razlago. Samo sem, ko sem vedno več letel, še sploh pa po ogledu DVDja "Secrets Of Thermal Soaring" videl, da vse skupaj ni tako preprosto.
Samo je napisal, da moraš termiko začutiti. Takrat še nisem razumel kako je točno mislil, čeprav je res lepo vse spisal. Ko pa sem nekajkrat letel in poskušal razumeti pa se mi je vse skupaj "odprlo". Ampak še vedno precej tavam "v temi". Vaja dela mojstra!
Samo je napisal, da moraš termiko začutiti. Takrat še nisem razumel kako je točno mislil, čeprav je res lepo vse spisal. Ko pa sem nekajkrat letel in poskušal razumeti pa se mi je vse skupaj "odprlo". Ampak še vedno precej tavam "v temi". Vaja dela mojstra!
Sakura Racing XI Sport Master (Endurance, stock, mild modified, modified), Hyper GTB E, Tekno EB48, itd...
-
mihah - Forumski odvisnež
- Prispevkov: 2683
- Pridružen: 22.11.2002, 17:04
- Kraj: Mengeš
Re: Jadranje v termiki
![]() Napisal/-a overlord_tm » 29.10.2004, 18:02
Napisal/-a overlord_tm » 29.10.2004, 18:02
Letme napisal/-a:V Telstare bi moral dati karbonse palčke
Termika pa povsod tam kjer se topel zrak dviga. Tud nad avtomobili
karbonske palčke v spoje med deli krila misliš? Morda še kakšni predlogi?
Karbonsko palčko v centroplan mislim. Tako da ti krila ne plosknejo
-
overlord_tm - Naš človek :)
- Prispevkov: 132
- Pridružen: 06.05.2004, 14:28
- Kraj: Domžale - Vir
![]() Napisal/-a ultralajt » 29.10.2004, 22:10
Napisal/-a ultralajt » 29.10.2004, 22:10
karbonske palčke v spoje med deli krila misliš? Morda še kakšni predlogi?
Karbonsko palčko v centroplan mislim. Tako da ti krila ne plosknejo
Na forumu : http://mdm.zrcalo.si/forum/viewtopic.php?t=4101
je slika (pripel sem jo spodaj) ki prikazuje kako in kje je vstavljena karbonska cevka (mislim da fi 6mm) v Telstarjevo krilo, ki ga blazno ojaca.
Model s posnetka je prezivel padec, pred tem pa tudi trcenje z mojim palicnjakom. Ce ne bi bilo noter cevke, bi ga moj laks prerezal skozi krilo, a se je ustavil na karbonski cevki.
Nimate dovoljenj za ogled prilog tega prispevka.
-

ultralajt - Forumski veteran
- Prispevkov: 913
- Pridružen: 07.04.2004, 16:35
Re: Jadranje v termiki
![]() Napisal/-a Letme » 30.10.2004, 10:23
Napisal/-a Letme » 30.10.2004, 10:23
Aha torej če prav razumem je to votla karbonska cevka, ki poteka samo po centroplanu... Telstar race ima krila sicer sestavljena iz centroplana, in nato se dveh ušk (nadaljevanje centroplana pa ne vem kako bi temu rekel  ) na katere sta pritrjeni se dve uški (ne wingleta) torej malce več spojev. Ali to pomeni, da bi bilo dobro dati karbonsko cevko tudi v prve uške?
Vse uške so namreč sestavljene iz reberc, za nameček pa je model v celoti narejen iz balze (kar je seveda super za izkoriščanje termike, vendar slabo kar se tiče trdnosti - itaq pa se imam sedaj namen malce navaditi na relax letenje (do sedaj sem letel z raznimi trainerji-akrobati na bencin, kar se je seveda poznalo tudi pri Telstarju - ki mi je plosknil, saj nisem imel karbonske cevke)). Torej ali so karbonske cevke še zmeraj priporočljive? (pomoje so, vendar me zanimajo vaša mnenja glede "odvečne" teže)
Vse uške so namreč sestavljene iz reberc, za nameček pa je model v celoti narejen iz balze (kar je seveda super za izkoriščanje termike, vendar slabo kar se tiče trdnosti - itaq pa se imam sedaj namen malce navaditi na relax letenje (do sedaj sem letel z raznimi trainerji-akrobati na bencin, kar se je seveda poznalo tudi pri Telstarju - ki mi je plosknil, saj nisem imel karbonske cevke)). Torej ali so karbonske cevke še zmeraj priporočljive? (pomoje so, vendar me zanimajo vaša mnenja glede "odvečne" teže)
I cannot do anything without fear
-
Letme - Novinec
- Prispevkov: 28
- Pridružen: 26.10.2004, 22:19
- Kraj: Ljubljana
Re: Jadranje v termiki
![]() Napisal/-a overlord_tm » 30.10.2004, 12:27
Napisal/-a overlord_tm » 30.10.2004, 12:27
Letme napisal/-a:Aha torej če prav razumem je to votla karbonska cevka, ki poteka samo po centroplanu... Telstar race ima krila sicer sestavljena iz centroplana, in nato se dveh ušk (nadaljevanje centroplana pa ne vem kako bi temu rekel
Vse uške so namreč sestavljene iz reberc, za nameček pa je model v celoti narejen iz balze (kar je seveda super za izkoriščanje termike, vendar slabo kar se tiče trdnosti - itaq pa se imam sedaj namen malce navaditi na relax letenje (do sedaj sem letel z raznimi trainerji-akrobati na bencin, kar se je seveda poznalo tudi pri Telstarju - ki mi je plosknil, saj nisem imel karbonske cevke)). Torej ali so karbonske cevke še zmeraj priporočljive? (pomoje so, vendar me zanimajo vaša mnenja glede "odvečne" teže)
Karbonsko "palčko" daš samo v centroplan, ker naprej ni več nobene koristi (razen seveda če je cela palčka iz enega kosa)
Seveda pa se potrudi, da dobiš čim lažjo palčko!
-
overlord_tm - Naš človek :)
- Prispevkov: 132
- Pridružen: 06.05.2004, 14:28
- Kraj: Domžale - Vir
![]() Napisal/-a MC GAYVER » 30.10.2004, 13:05
Napisal/-a MC GAYVER » 30.10.2004, 13:05
v tel star race bo 5mm karbon rorček že v kitu
To kar je sedaj zunaj so poizkusnui prototipi ki pa zgleda niso prišli v prave roke (sory)
še slikca kako ojačati nosilec z 2mm karbon palčko ki je lažja
ko je centroplan izdelan na špico obrušeno palčko porineš ob nosilcu skozi vsa rebra in jo prilepiš z dvokomponentnim epoksidnim lepilom k nosilcu tako krilo se ne da zaloputnit razen čez koleno
Nimate dovoljenj za ogled prilog tega prispevka.
-
MC GAYVER - Stara sablja
- Prispevkov: 1522
- Pridružen: 06.03.2003, 18:18
- Kraj: Ljubljana
Re: Jadranje v termiki
![]() Napisal/-a Letme » 31.10.2004, 11:19
Napisal/-a Letme » 31.10.2004, 11:19
MC GAYVER napisal/-a:v tel star race bo 5mm karbon rorček že v kitu
To kar je sedaj zunaj so poizkusnui prototipi ki pa zgleda niso prišli v prave roke (sory)
še slikca kako ojačati nosilec z 2mm karbon palčko ki je lažja
ko je centroplan izdelan na špico obrušeno palčko porineš ob nosilcu skozi vsa rebra in jo prilepiš z dvokomponentnim epoksidnim lepilom k nosilcu tako krilo se ne da zaloputnit razen čez koleno
Eh ne skrbet- je že prišlo v prave roke. Sam namreč dosti rad eksperimentiram, saj se ob tem veliko koristnega naučim. Sploh pa modele zelo zelo rad sestavljam (tudi iz 0) tako, da pač ne bo kakšne škode, če bo kaj narobe, slabo ali pa kako drugače "zafušano", saj mi je Telstar Race všeč (bom pa še enega naredil)
Prototip bom danes že začel sestavljati tako, da bodo še kakšni nasveti prišli še kako prav (ponavadi začnem pri "uškah"). Aja še to, karbonske paličice pa dobim v ??? (astri kemo-jarše?)
I cannot do anything without fear
-
Letme - Novinec
- Prispevkov: 28
- Pridružen: 26.10.2004, 22:19
- Kraj: Ljubljana
![]() Napisal/-a mihah » 31.10.2004, 12:27
Napisal/-a mihah » 31.10.2004, 12:27
Še najcenejše karbonske cevke in palčke dobiš v Trivalu. Pomembna je le prečna trdnost ne pa vzdolžna po kateri se prerade cepijo (zato niso uporabne pri čolnih...)
http://www.trival-kompoziti.si/
točno
http://www.trival-kompoziti.si/trival-k ... lki/ov.htm
http://www.trival-kompoziti.si/
točno
http://www.trival-kompoziti.si/trival-k ... lki/ov.htm
Sakura Racing XI Sport Master (Endurance, stock, mild modified, modified), Hyper GTB E, Tekno EB48, itd...
-
mihah - Forumski odvisnež
- Prispevkov: 2683
- Pridružen: 22.11.2002, 17:04
- Kraj: Mengeš
Re: Jadranje v termiki
![]() Napisal/-a Letme » 31.10.2004, 15:08
Napisal/-a Letme » 31.10.2004, 15:08
Aha najlepsa hvala... samo glede debeline mi se niste povedali? 6mm, 5mm, 2mm?
Zanima pa me tudi kako pritrdite krila na centroplan (spoj uška centroplan), saj sem se zaradi velikosti krila odločil, da bo iz treh delov zaradi lažjega transporta (da bo šel tudi v kakšen majhen avto brez težav). Zanimajo me tudi vaša mnenja ali se to splača, ali je bolje vse skupaj zlepiti v eno 2.2m dolgo krilo?
(kmalu lahko na forum pošljem slike mojega dela - če vas zanima)
I cannot do anything without fear
-
Letme - Novinec
- Prispevkov: 28
- Pridružen: 26.10.2004, 22:19
- Kraj: Ljubljana
25 prispevkov
• Stran 1 od 2 • 1, 2
Kdo je na strani
Po forumu brska: 0 registriranih uporabnikov in 4 gostov